GRMustache
https://github.com/groue/GRMustache
GRMustache は mustache という汎用的なテンプレートエンジンの仕様をObjective-C で実装したもの。
使ってみよう
新たなプロジェクトを作成し、GRMustache を使えるようにします。
まずソースコードの取得
git clone https://github.com/groue/GRMustache.git
README には「静的ライブラリ(.a) とヘッダファイルをあなたのプロジェクトにインポートして使ってくれ」と書いてあります。
ls lib/
libGRMustache1-ios3.a libGRMustache1-ios4.a libGRMustache1-macosx10.6.aうっ。libGRMustache1-ios5.a がない…… とりあえず、libGRMustache1-ios4.a を使ってみます。
Xcode のBuild Phases から追加し、その後、include ディレクトリもまるごと追加します。
AppDelegate.m を編集し簡単な動作確認をしてみます。
簡単に画面表示をする為にUIWebView を使ってますが、とくに依存しているわけではありません。
#import "AppDelegate.h"

#import "GRMustache.h"

@implementation AppDelegate

@synthesize window = _window;

- (BOOL)application:(UIApplication *)application didFinishLaunchingWithOptions:(NSDictionary *)launchOptions
{
  self.window = [[UIWindow alloc] initWithFrame:[[UIScreen mainScreen] bounds]];
  UIWebView* webView = [[UIWebView alloc] initWithFrame:self.window.frame];

  NSDictionary *object = [NSDictionary dictionaryWithObjects:[NSArray arrayWithObjects:@"Flash", @"HTML5", nil]
                                                     forKeys:[NSArray arrayWithObjects:@"bad", @"good", nil]];
  NSString* HTML = [GRMustacheTemplate renderObject:object fromString:@"<h1>{{bad}}死ね! {{good}}最高!</h1>" error:nil];

  [webView loadHTMLString:HTML baseURL:[NSURL URLWithString:@"http://"]];

  [self.window addSubview:webView];
  [self.window makeKeyAndVisible];
  return YES;
}
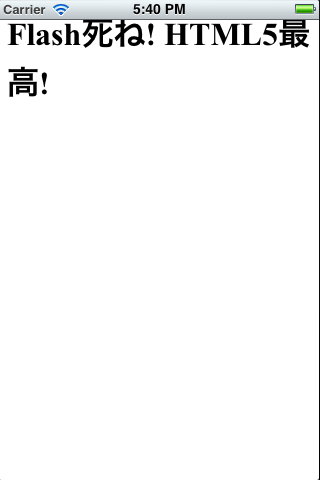
できました。
さらに
条件分岐
{{#display}}
    表示フラグオン
{{/display}}
object = [NSDictionary dictionaryWithObjects:[NSArray arrayWithObjects:[NSNumber numberWithBool:NO], nil] forKeys:[NSArray arrayWithObjects:@"display", nil]];
ループ
お買い物リスト:
<ul>
{{#items}}
    <li>{{name}}</li>
{{/items}}
</ul>
NSArray* list = [NSArray arrayWithObjects:[NSDictionary dictionaryWithObject:@"ナッパ" forKey:@"name"], [NSDictionary dictionaryWithObject:@"ベジータ" forKey:@"name"], [NSDictionary dictionaryWithObject:@"ラディッツ" forKey:@"name"], nil]; object = [NSDictionary dictionaryWithObjects:[NSArray arrayWithObjects:list, nil] forKeys:[NSArray arrayWithObjects:@"items", nil]];
ネットワークアクセス前提のアプリケーションだと、テンプレート自体をデベロッパーのウェブサーバで配信して、アップルレビューの及ばないところでUI を更新するとか(Evernote とかがローカライズファイルでやってた)
  NSURL* remoteTemplate = [NSURL URLWithString:@"http://api.example.jp/toppage.mustache"];
  NSString* HTML = [GRMustacheTemplate renderObject:object fromContentsOfURL:remoteTemplate error:nil];
  [self loadHTMLString:HTML baseURL:nil];
A/Bテストなどもしやすくなりますね。
テンプレートを使い回す場合は一度コンパイルするといいです。
  GRMustacheTemplate* template = [GRMustacheTemplate parseResource:@"hello.mustache" bundle:[NSBundle mainBundle] error:nil];
  NSString* hogeHTML = [template renderObject:hoge];
  NSString* fugaHTML = [template renderObject:fuga];
NSDictionary だけでなく、Key-Value コーデイングに対応したオブジェクトも渡せます
@interface Person: NSObject
+ (id)personWithName:(NSString *)name;
- (NSString *)name;
@end

// returns @"Hi Mom!"
[GRMustacheTemplate renderObject:[Person personWithName:@"Mom"]
                      fromString:@"Hi {{name}}!"
                           error:nil];
テンプレートのインクルードも
{{! footer.mustache }}
<p>フッターです</p>
{{! hello.mustache }}
<p>本文です</p>
{{>footer}}
  NSString* HTML = [GRMustacheTemplate renderObject:nil fromResource:@"hello" bundle:[NSBundle mainBundle] error:nil];
  [webView loadHTMLString:HTML baseURL:[NSURL URLWithString:@"http://"]];
まとめ
GRMustache を利用することにより、長文のテキストフォーマットをn番目の%@ はperson.name で-—— のように取り扱ったり。NSMutableString を引き回して見通しの悪いコードができてしまうのを防げました。
また、UIWebView との組み合わせにより曖昧になりがちなViewContorller とView の分離、デザイナーとの協業(歯の浮く台詞のひとつです)、プロトタイプの作成などに活用できると思います。
正直ドキュメントに載っていることを全部紹介しきれないぐらいだったので、興味があったらgithub プロジェクト やツイッターアカウントなどを参照してください。